
IKEA is one of the most popular furniture stores globally, providing modern, beautiful pieces for a great price. The only problem is, they don’t assemble anything – you have to do it yourself. While assembly usually isn’t the problem if you stick to the detailed instructions provided with your product.
But, when you wish to disassemble it, there are no instructions, and things can get tricky very quickly. Most notably, people are having trouble getting the drawers out of IKEA products without breaking them. So, how do you remove IKEA drawers?
You can disassemble every IKEA product, and the drawers usually come out easily. The exact steps depend on the model, but most commonly, you need to pull the drawer out as far as you can and then pull it upwards to take it off the rails and out.
Sometimes, that technique won’t work, depending on what model of IKEA furniture you have. Let’s take a look at some of the most popular IKEA models and how to remove their drawers.
Do IKEA Drawers Come Out?
As mentioned in the introduction, you can disassemble every IKEA model. Some models are simpler – just open the drawer as much as possible and yank it upwards to get it off the side rails. If it isn’t working, there might be a small screw on both rails holding the drawer on, so you need to remove it.
Sometimes, you’ll first need to remove the front side of the drawer to get to the small piece of plastic holding the drawer in place. Use a flat screwdriver to get the piece out of the rails gently. When you do that, the drawer will be free to come out.
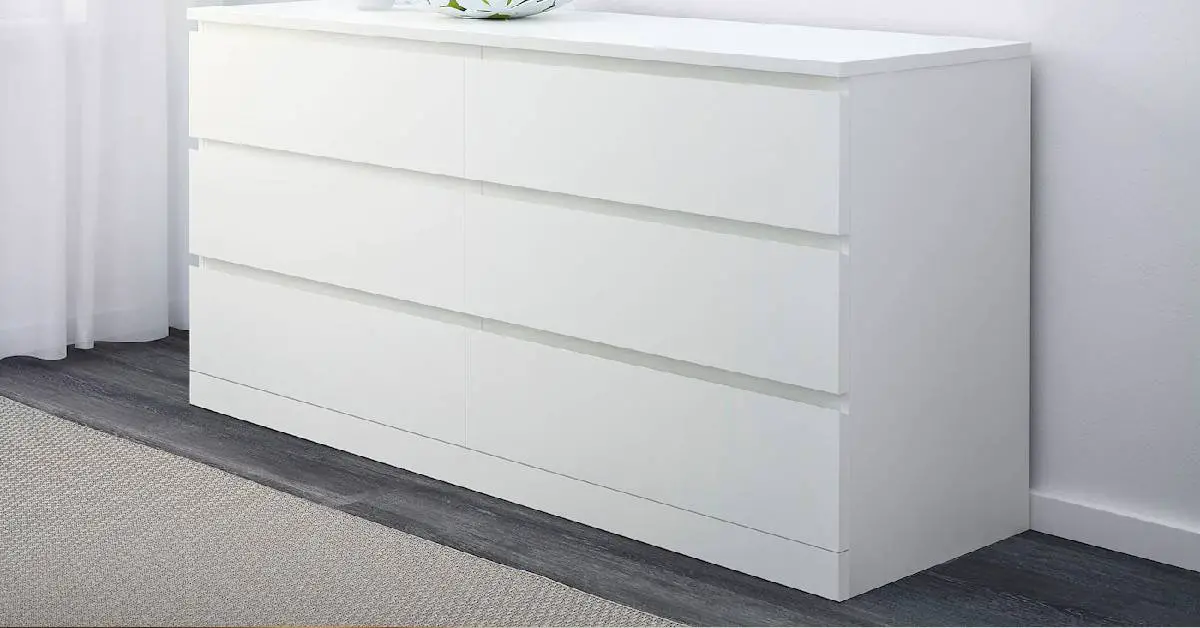
How Do You Get IKEA Malm Drawers Out?
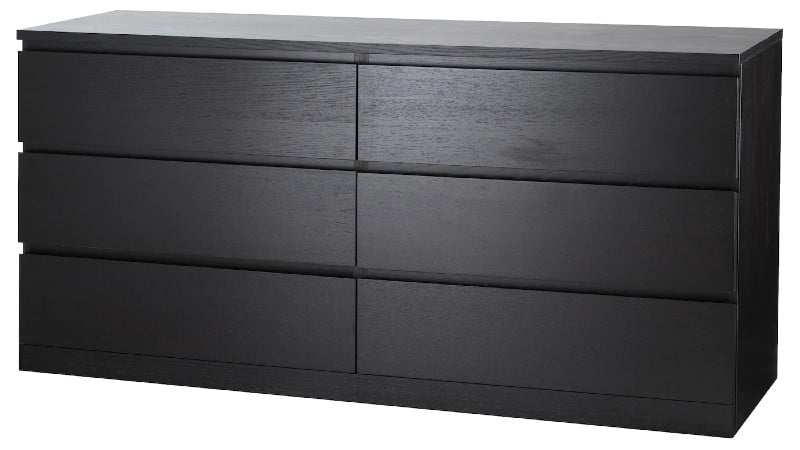
IKEA Malm is one of the models with tiny screws holding the drawers in place on the rails. Therefore, you can’t remove it unless you remove the screws first. To locate them, open the drawer as far as it goes.
The two screws (one on each side) going through the sliders and the drawer should now be visible. After you unscrew them, simply pull the drawer up and out.
How Do You Remove an IKEA Maximera Drawer?
Maximera is simpler to take out than Malm because the drawers aren’t connected with screws but rather fit into the sliders. That makes it easier to take out because all you need to do is to get the drawer out of the sliders.
To do that, pull the drawer open as far as it goes before being blocked. Near the back of the drawer, you’ll find a small lever (push tab) on both sides of the movable sliders. Push them out of place simultaneously. It’ll free the drawer and let you simply take it out.
How Do You Remove an IKEA Alex Drawer?
Most pieces have drawer blocks that prevent the drawers from going all the way out when you pull on them. It’s to prevent the drawer from falling on your feet or making a mess in your room. IKEA Alex drawers have the blocks too, so you need to remove them if you want the drawers to come out.
It’s yet again very simple. Pull the drawer out as far as possible. Around 15 cm from the front, you’ll see a screw on each side slider. Those screws are the drawer blocks. Remove them with a Philips screwdriver, and the drawers will easily come out all the way.
How to Remove an IKEA Drawer Front?
If you want to replace your drawer fronts and not the whole drawer, you can remove the front only. To do that, open the drawer completely. You’ll see there’s a plastic cover on each side near the top front corner. Remove that cover to reveal a couple of screws (usually, there are four).
You need to focus on the top screw. It’s not a screw but rather a mechanism holding the front in place. Turn it counterclockwise on both sides, and the front will easily come off. If it’s a tall drawer, it might have two more supporting screws on the bottom side. Remove them too, and you’re good to go.
How to Remove IKEA Wardrobe Drawers?

IKEA wardrobes usually use the same methodology as their other furniture with drawers. Only this time, the sliders will be on the bottom, not on the sides, which makes removing even easier. Simply pull the drawer out as far as you can and then up. It should come right out of the small holes holding it in place, allowing you to remove it completely.
Be careful, though. This will remove the drawer completely from the slider. It might be tightened to the sliders with screws. If it doesn’t come off easily, check for screws, remove them, and repeat the process.
How to Remove IKEA Besta Drawers?
IKEA Besta might seem a bit more tricky because the drawers don’t have handles but rather a push-open mechanism. Well, the process of removing them is the same – you just open the drawer up as far as possible, remove the two screws on each side, and take the drawer out.
Side note: if you install the soft-close mechanism of your push-open drawers, it’ll prevent them from opening on push. You need to remove the song-close mechanism if you want the push-open drawers to work properly.
How to Remove IKEA Rationell Drawers?
I saved IKEA Rationell for last, as this one is the trickiest I’ve encountered when it comes to drawer removal. The drawers aren’t held on the sliders with screws but rather a small white plastic lip that fits inside the slider. To remove the drawers, first, you need to remove the plastic lips.
Open the drawer completely. You’ll be able to see the white lip on the bottom side of the drawer, near the front. Use a flathead screwdriver to lift the lip out of the slider. Do it on both sides, and it should allow you to remove the drawer.
Things get trickier if it’s the bottom drawer and you can’t reach the bottom. In that case, you need to remove the front panel first using the method described earlier (remove the little plastic cap on the side, turn the top left screw counter-clockwise, etc.).
When you remove the front, you’ll see the white plastic lip from another angle. Still, you need to use a flathead screwdriver to snap it out of position. Be careful not to use too much force because the lip can break. When it’s out on both sides of the drawer, you can pull it out with ease.